
A Simple Implementation of Boosting Algorithm
...covered with design principles for Boosting.

[4 Days Left] Secure Lifetime Access at 33% off
In 4 days, the pricing of lifetime access to DailyDoseofDS will increase from 3x the yearly price to 3x.
Secure your Lifetime Access at a discount here →
It gives you lifetime access to our all-in-one hands-on blueprints designed specifically to succeed in AI Engineering roles:

Here’s what you’ll get:
The 17-part course that covers how to build Agentic systems.
Our 18-part MLOps course that goes from first principles to production.
The full 9-part course on MCPs.
Our 7-part course on building RAG systems.
LLM fine-tuning techniques and implementations.
Our courses on graph neural networks, PySpark, model interpretability, model calibration, causal inference, and more.
Scaling ML models with implementations.
Building privacy-preserving ML systems.
Mathematical deep dives on core DS topics, clustering, etc.
From-scratch implementations of several core ML algorithms.
Building 100% reproducible ML projects.
50+ more existing industry-relevant topics.

You will get all 100+ existing resources plus every new weekly deep dive for life.
Secure your Lifetime Access at a discount here →
P.S. Our last sale was 12+ months ago. We don’t run black friday, Cyber Monday promotions, etc., and might never offer discounts again.
Join 100k+ people that we helped get promoted, get a better job, or start their own company →
P.S. If you are an existing monthly or yearly member and wish to upgrade to lifetime, please reply to this email.
A simple implementation of Boosting algorithm
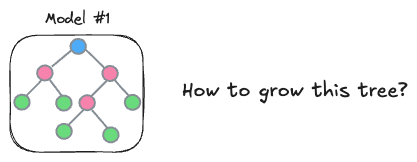
The core idea behind Boosting is quite simple: The subsequent model utilizes information from the previous model to form a more informed model.

While the idea is simple…
…many find it difficult to understand how this model is precisely trained and how information from a previous model is used by a subsequent model.
Today, let’s look at a simple boosting implementation using the decision tree regressor of sklearn.
Let’s begin!
Firstly, you need to understand that there are a limited number of design choices that go into building a boosting model:
How you construct each tree → Which features to split on at each level and the splitting criteria
How to construct the next tree based on the current trees → The variable here is the loss function. This guides the model on how to focus the next tree to correct the errors of the previous ones.

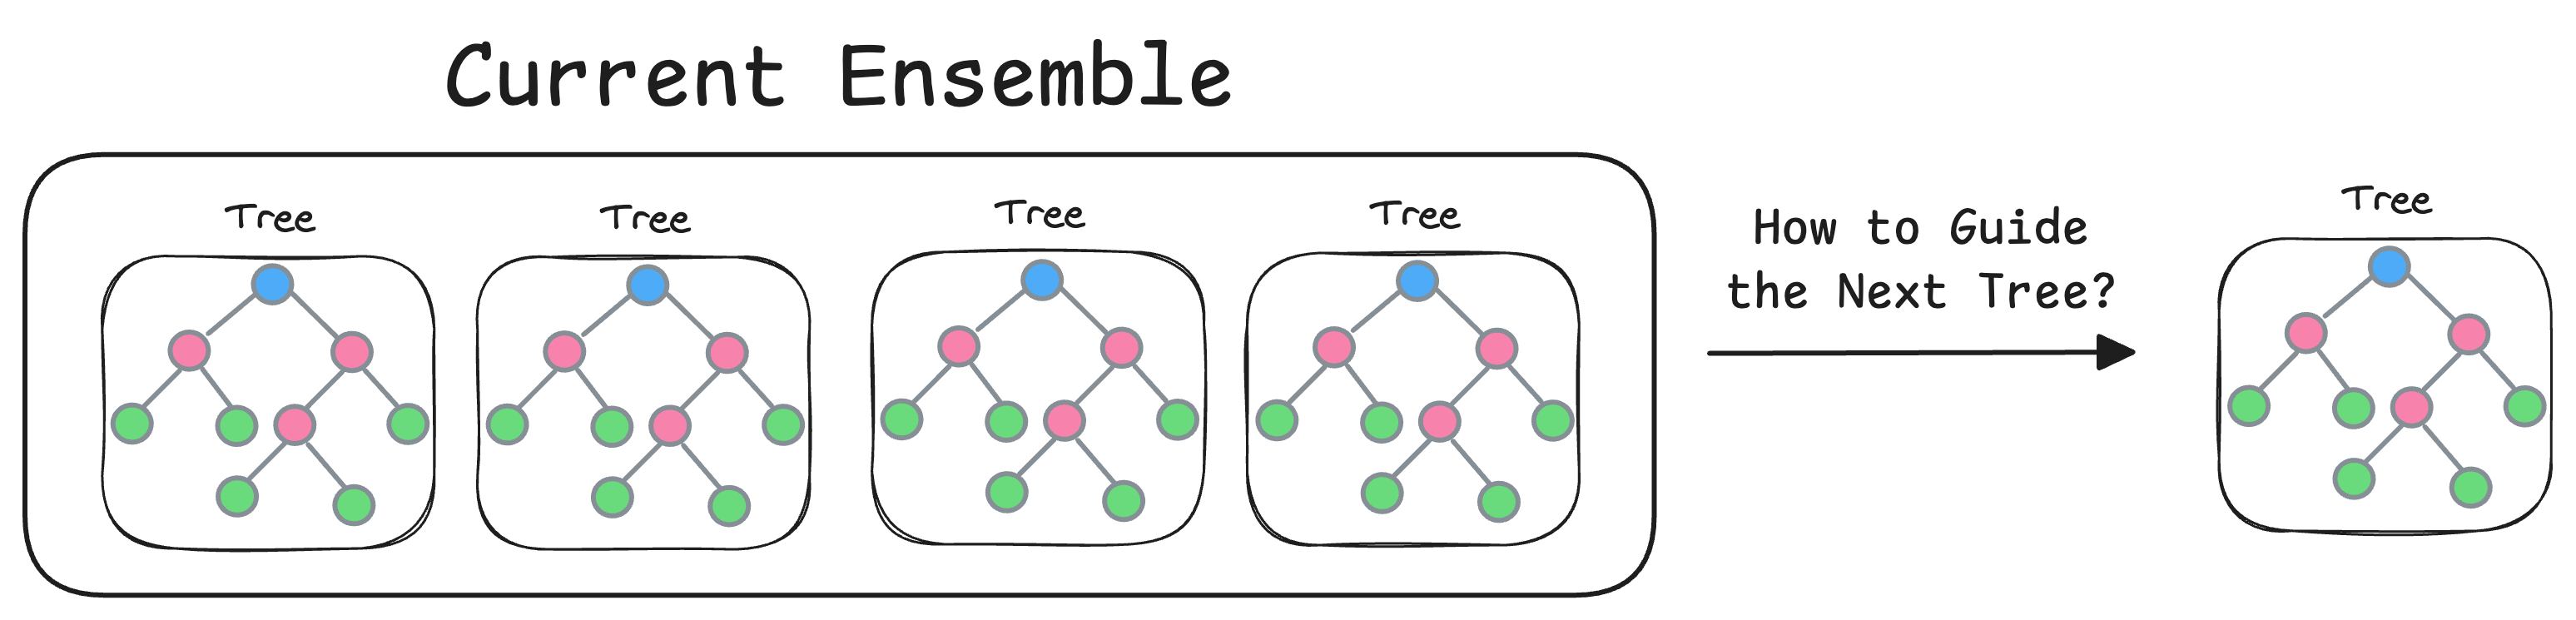
How to weigh the contribution of each tree in the final model → This determines the influence of each tree in the overall ensemble.
You can vary the design choice of these three factors to get a different boosting algorithm (read this to learn how XGBoost does it, with from-scratch Python code).
Let’s look at an implementation below.
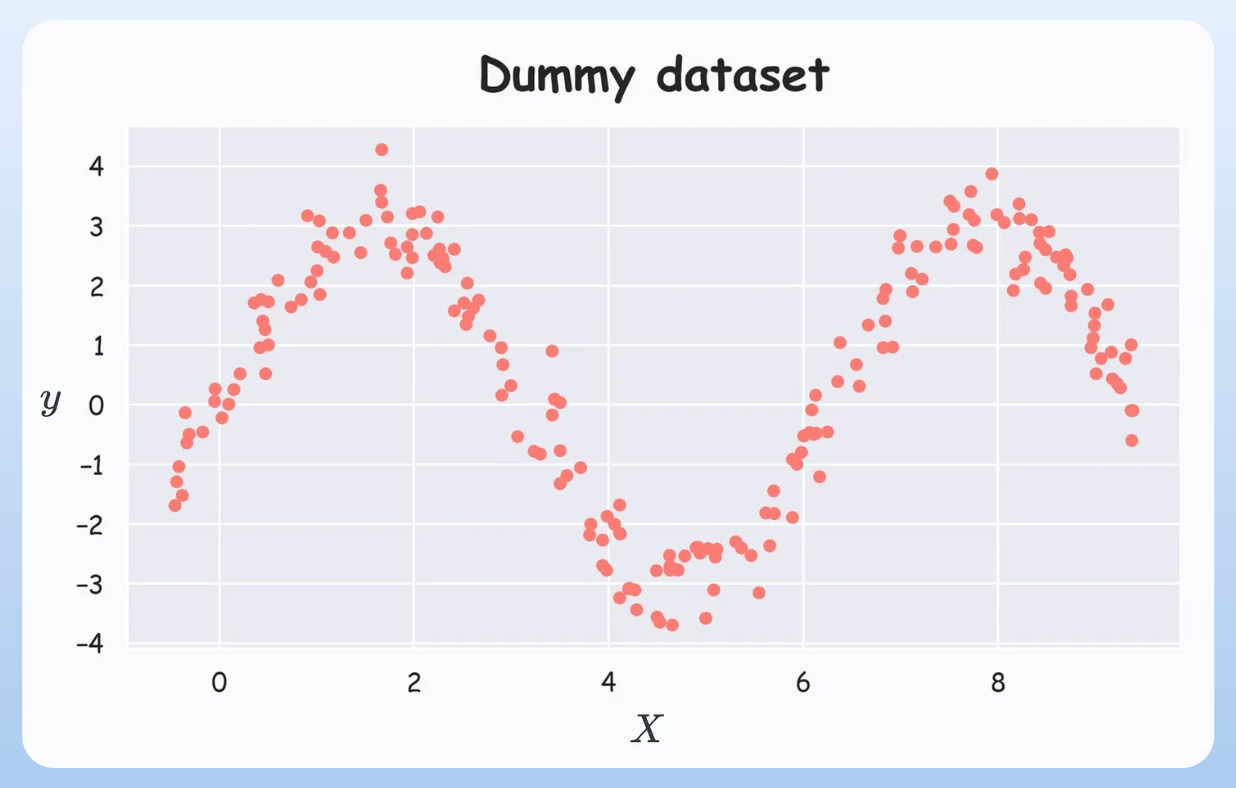
Consider the following dummy dataset:
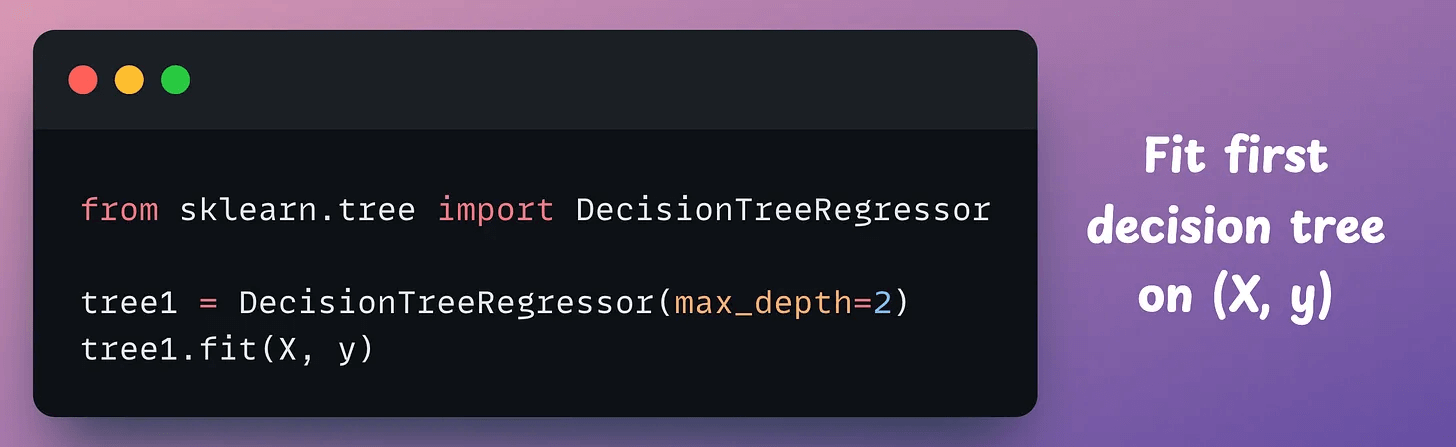
We construct the first tree on this dataset as follows:
Measuring the performance (R2), we get:

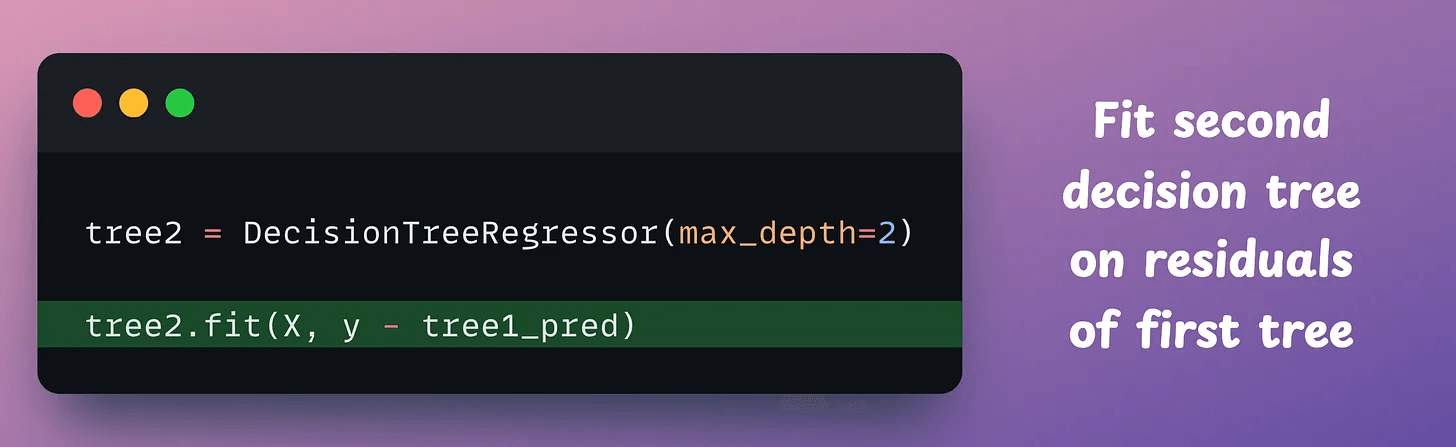
Now, to construct the next tree, we fit another model on the residuals (true-predicted) of the first tree:
Yet again, we measure the performance of the current ensemble:
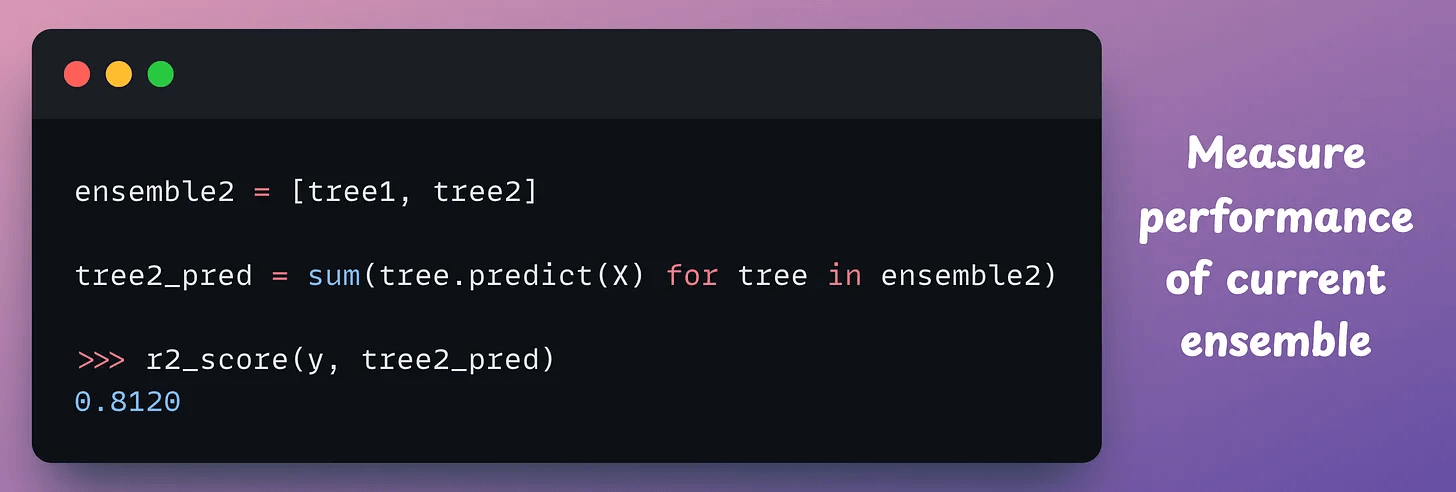
The R2 score has jumped from 0.68 to 0.81.
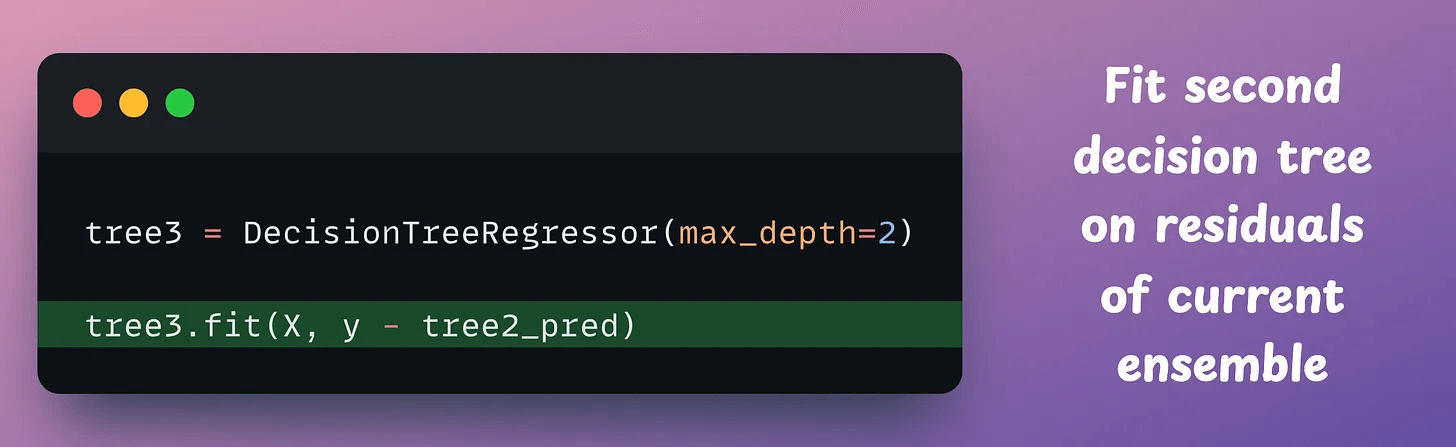
Now, let’s construct another tree on the residuals (true-predicted) of the current ensemble:
Let’s measure the performance once again:
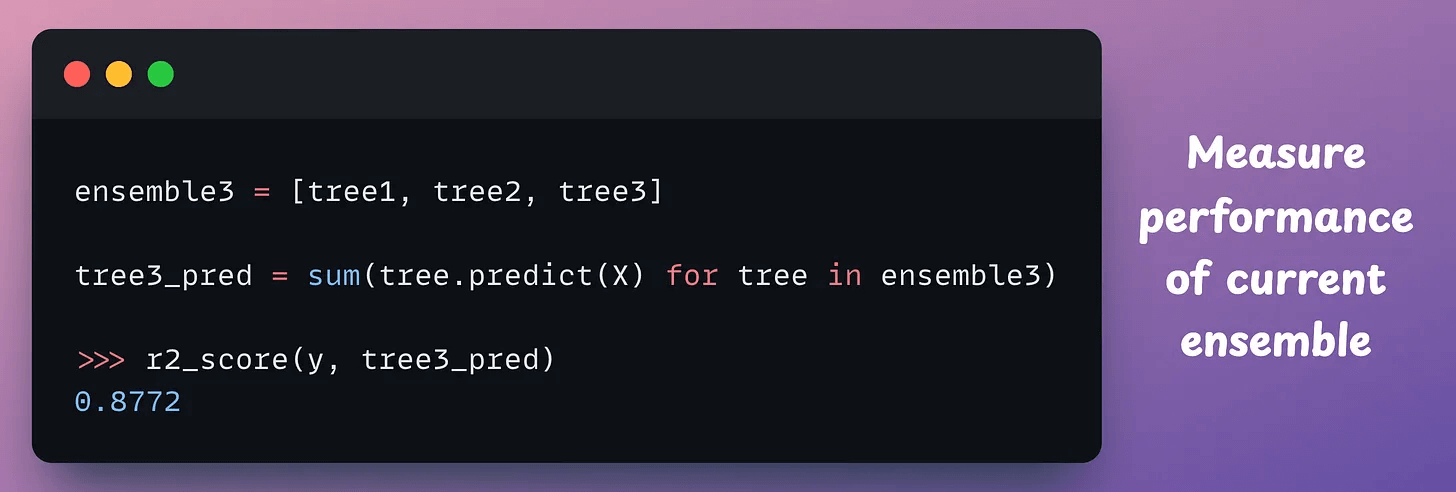
The R2 score has jumped from 0.81 to ~0.88.
We can continue to build the ensemble this way and generate better scores.
At this point, we can also visualize this performance improvement by incrementally plotting the fit obtained as we add more trees:

As we add more trees, the model tends to fit the dataset better.
And that is how the core idea behind Boosting is implemented.
Boosting algorithms have been one of the most significant contributions to tabular machine learning.
We formulated and implemented the XGBoost algorithm from scratch here: Formulating and Implementing XGBoost From Scratch.
👉 Over to you: Can you tell why, typically, Boosting is better than Bagging?
Thanks for reading!