

In today’s newsletter:
Free course to learn Generative UI, Anthropic’s most viral feature.
Claude Code used 3x fewer tokens with just one change!
Docker explained in 2 minutes!
Active learning in ML.
Learn Generative UI, Anthropic’s most viral feature
Andrew Ng’s DeepLearningAI just released a new free course on building Interactive Agents with Generative UI, covering the full stack from scratch:
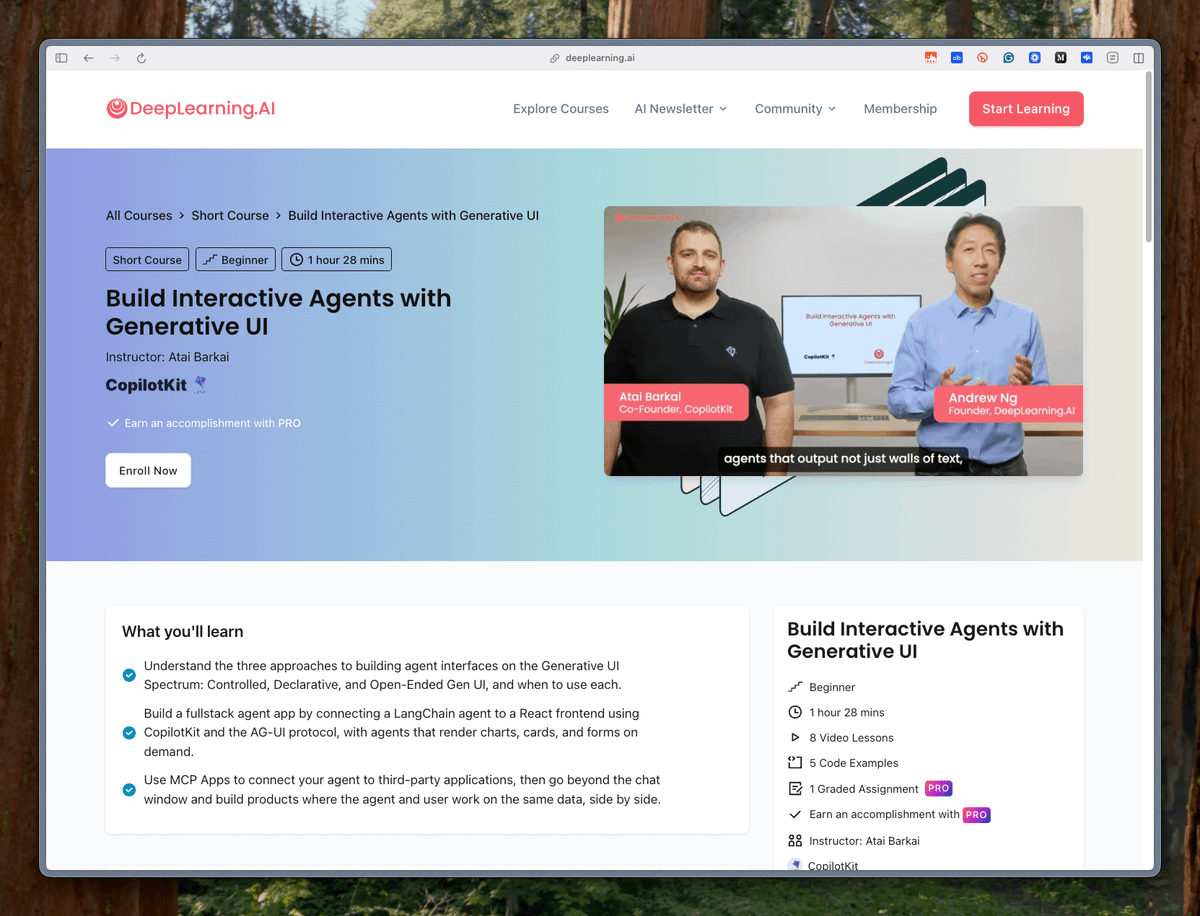
Claude Artifacts showed what happens when agents generate UI instead of text, like charts, dashboards, and interactive components, all assembled live inside the chat.
Every major AI product tried to replicate it.
CopilotKit is the only open-source framework (repo) that actually lets you build your own full-stack Claude-like apps.
The course covers three approaches on the Generative UI spectrum, including:
1) Controlled → the agent picks from pre-built components like pie charts and flight cards.
2) Declarative → the agent assembles layouts from reusable building blocks using A2UI, co-developed with Google.
3) Open-ended → the agent generates arbitrary HTML/SVG from scratch, streamed token-by-token into a sandboxed iframe.
You can implement the entire Generative UI spectrum through AG-UI, and it works out of the box with LangGraph, Google ADK, CrewAI, Mastra, AWS Strands, and more.
This entire stack is built on top of CopilotKit.
31k+ GitHub stars, with SDKs for React, Next.js, Angular, and Vue.
You can watch the course here →
And here’s the CopilotKit GitHub repo →
Devs who watch this tonight will know how to build agent interfaces that go beyond plain text by tomorrow.
Claude Code used 3x fewer tokens with just one change!
Before writing a single line of code, the agent must know:
the existing tables and schemas
the configured auth providers
the available storage buckets
the deployed edge functions
the available AI models
the active RLS policies
Most backends expose this via MCP tools, which means the agent discovers each piece through a separate call.
This is a problem because Claude Code re-sends the full conversation on every turn, so each discovery call is more expensive than the last.
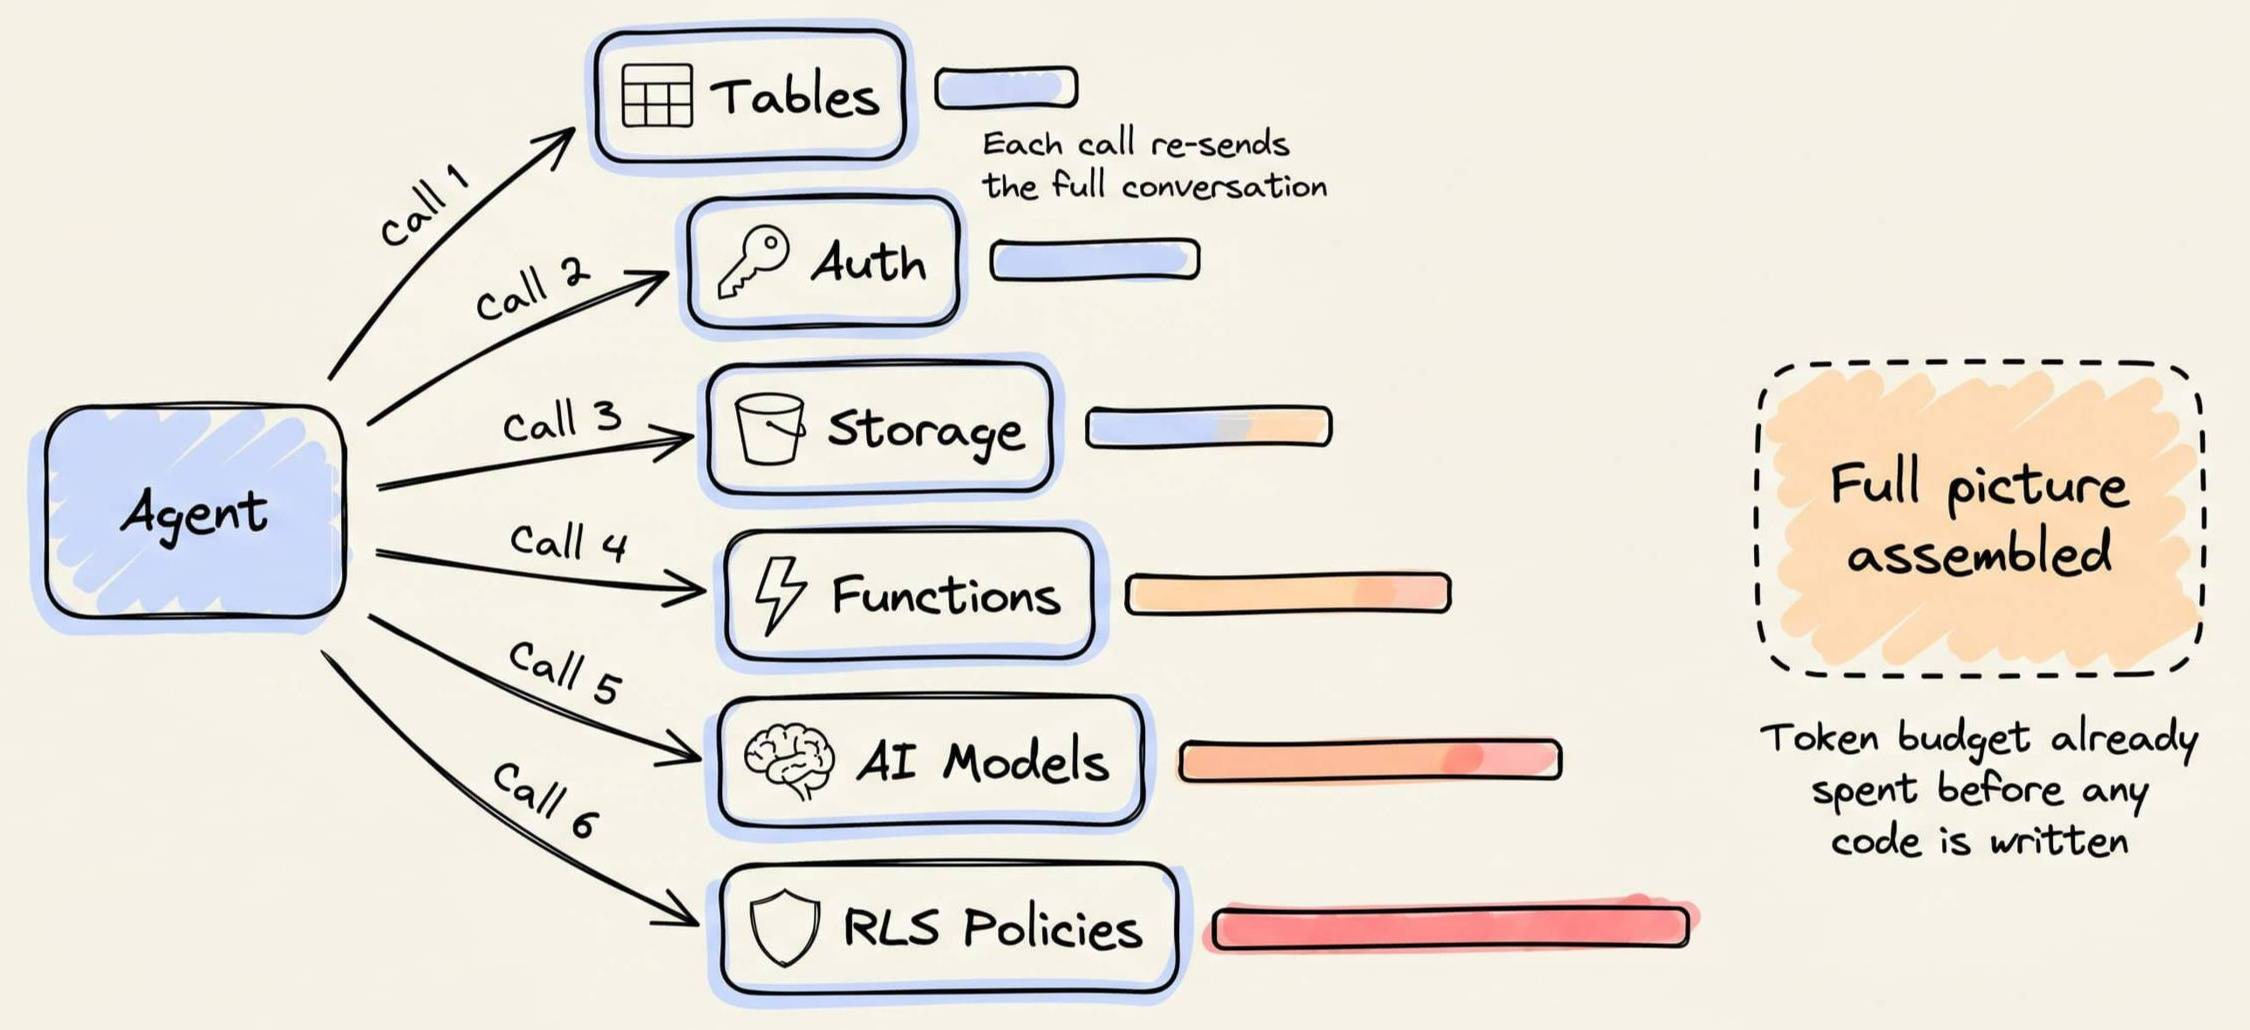
So by the time the agent understands the backend, a significant chunk of the token budget is already gone.
Some info, like auth provider config, isn’t queryable at all. Either the developer manually provides it in the prompt or the agent assumes it.
These wrong assumptions only surface as runtime errors after the code is already written.
And when something breaks, the errors don’t say where the failure came from. So the agent retries, re-sending the entire growing conversation each time.
A smarter model has no way to skip these gaps.
If anything, it actually tries harder to fill them, which is why MCPMark V2 benchmarks showed a ~60% increase in backend token usage after a model upgrade.
In our own test, this setup cost 10.4M tokens and 10 manual interventions on a single RAG app.
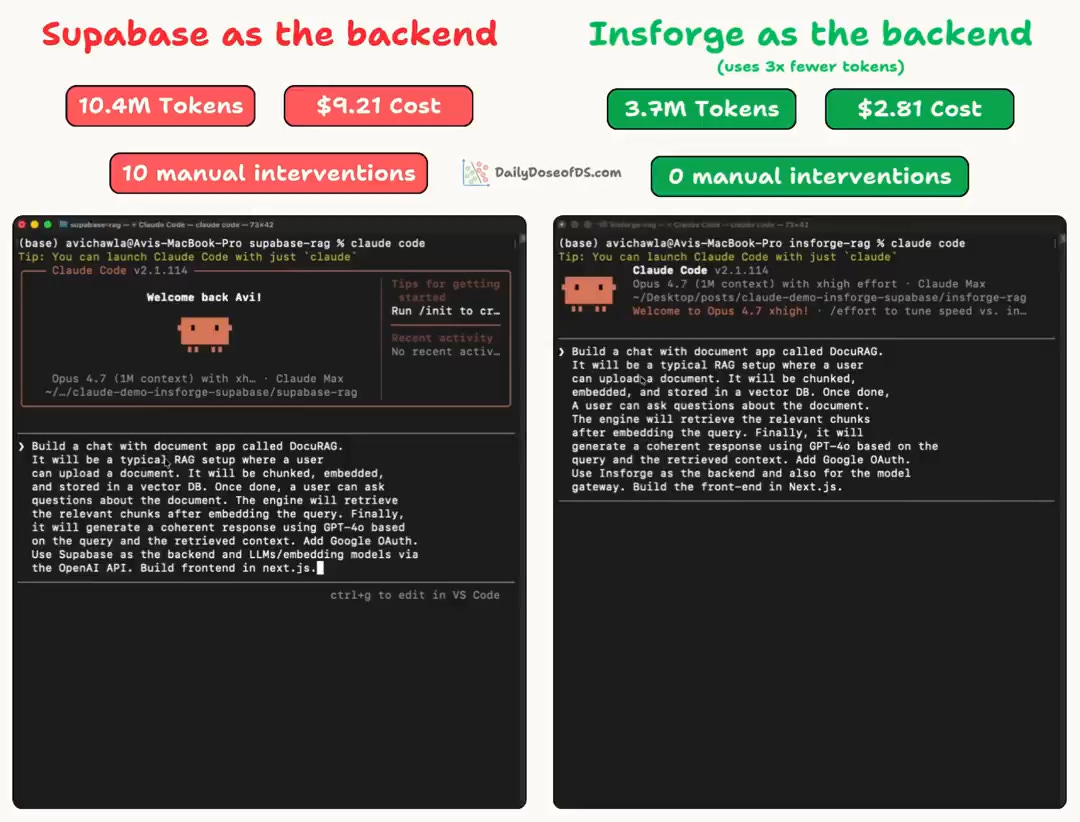
But we brought that down to 3.7M tokens and 0 manual interventions by using InsForge (GitHub repo) as the backend context engineering layer for Claude Code (open-source and self-hostable via Docker).
It provides the same primitives as Supabase but structures the entire information layer for agents instead of dashboards.
In one CLI call that consumes ~500 tokens, the agent can see the full backend topology before writing a single line of code.
This includes auth, database, storage, edge functions, model gateway, micro VMs, and deployment.
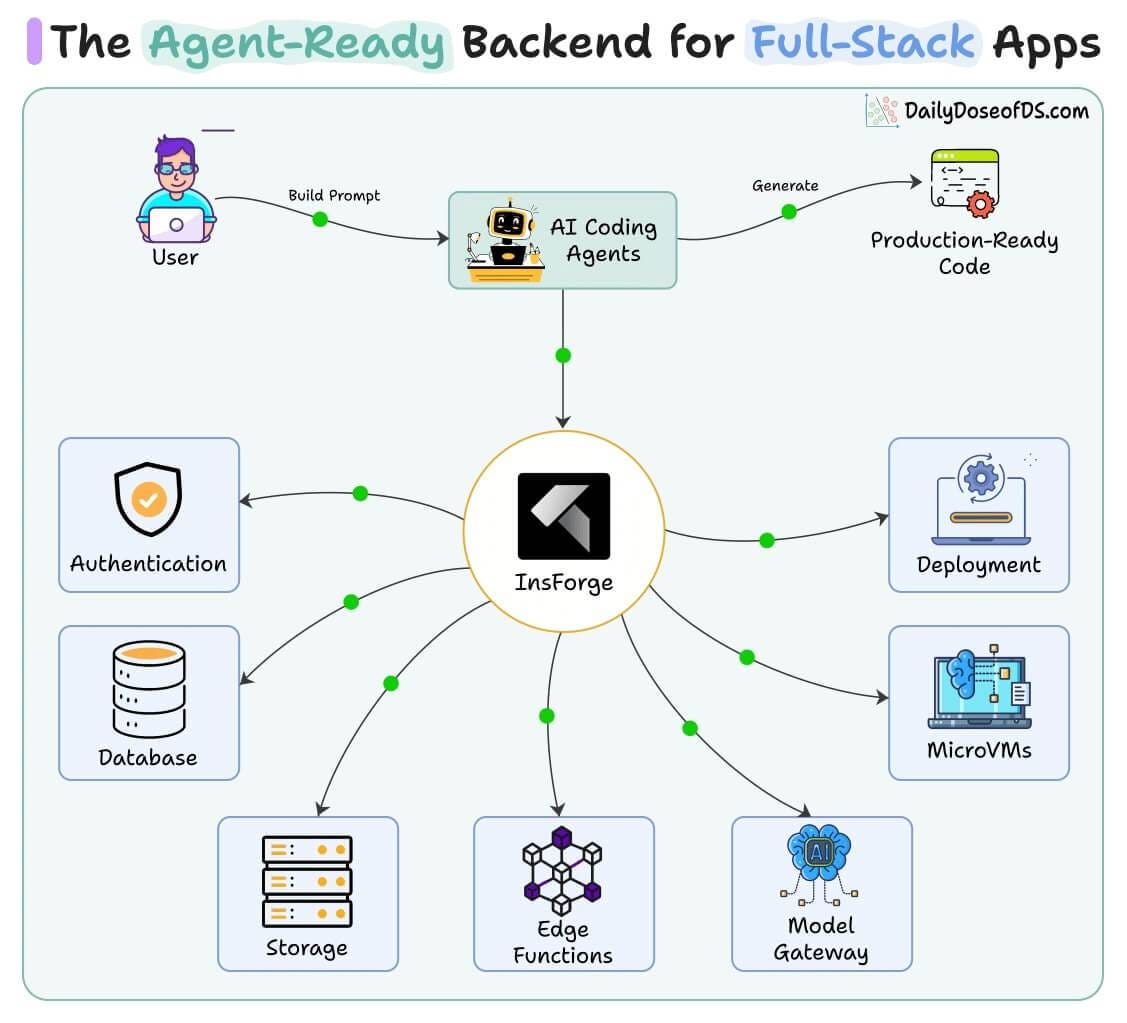
Also, instead of loading the entire product surface into context on every task, four narrowly scoped skills activate only when relevant to keep cognitive load minimal.
And to ensure efficient retries if needed, every CLI operation returns structured JSON with meaningful exit codes, so the agent never has to guess what to do next.
Here’s the InsForge GitHub Repo → (don’t forget to star it ⭐)
You can find our full 100% local setup guide in this issue →
Docker explained in 2 minutes!
Developers typically use Docker daily without understanding what happens under the hood. Here’s everything you need to know.
Docker has 3 main components:
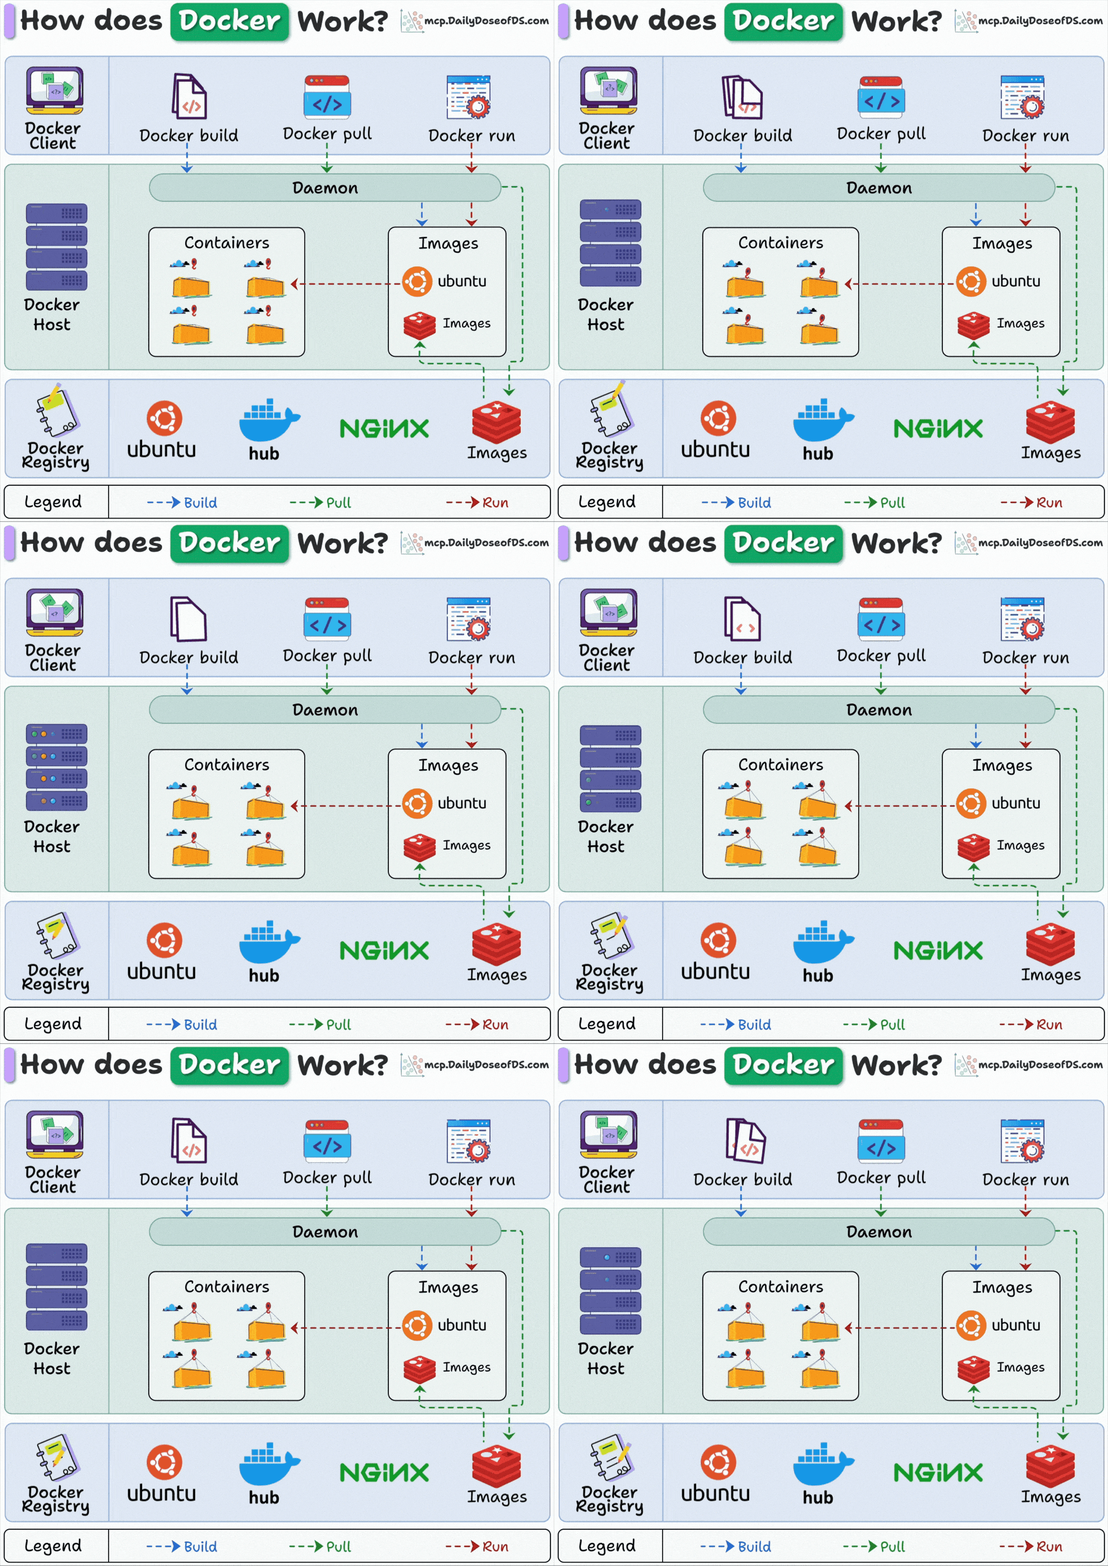
Docker Client: Where you type commands that talk to the Docker daemon via API.
Docker Host: The daemon runs here, handling all the heavy lifting (building images, running containers, and managing resources)
Docker Registry: Stores Docker images. Docker Hub is public, but companies run private registries.
Here’s what happens when you run “docker run”:
Docker pulls the image from the registry (if not available locally)
Docker creates a new container from that image
Docker allocates a read-write filesystem to the container
Docker creates a network interface to connect the container
Docker starts the container
That’s it.
The client, host, and registry can live on different machines. This is why Docker scales so well.
Understanding this architecture makes debugging container issues much easier. You’ll know exactly where to look when something breaks.
Active learning in ML
Data annotation is difficult, expensive, and time-consuming.
Active learning is a relatively easy and inexpensive way to build supervised models when you don’t have annotated data to begin with.
As the name suggests, the idea is to build the model with active human feedback on examples it is struggling with.
The visual below summarizes this:
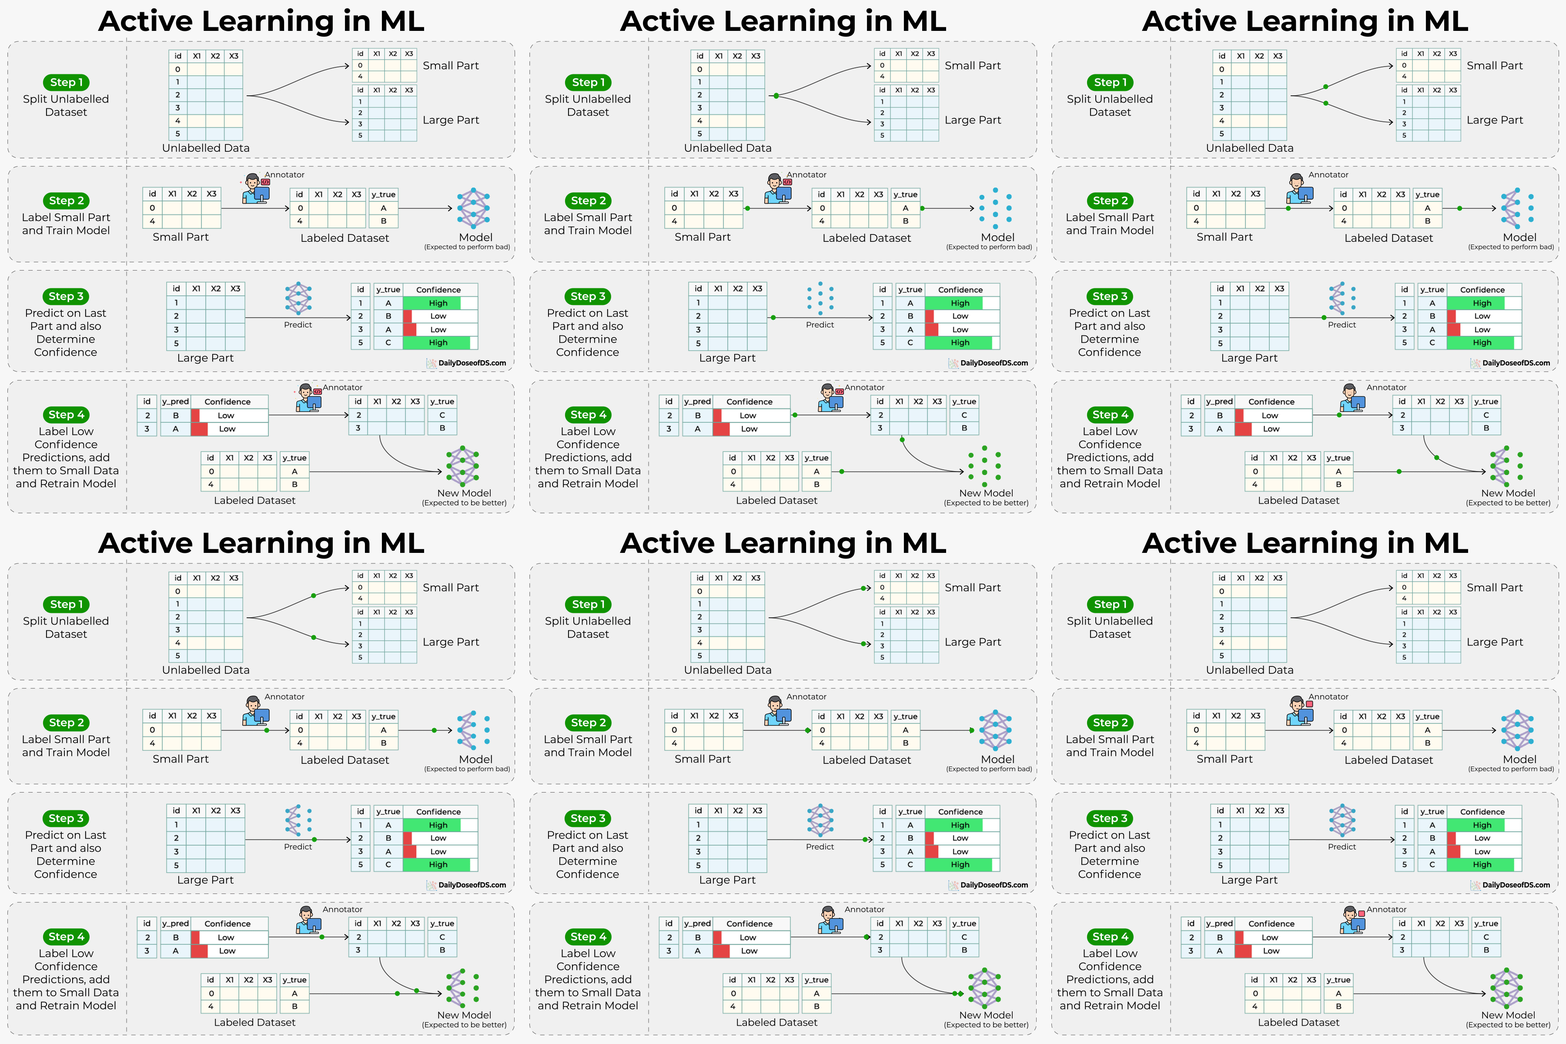
Manually label a tiny percentage of the dataset.
Build a model on this small labeled dataset (model should be able to provide confidence values)
Generate predictions on the unlabeled dataset.
Label low confidence predictions and add them to the labeled dataset.
Back to step 2.
Active learning is a huge time-saver in building supervised models on unlabeled datasets.
The only thing that you have to be careful about is generating confidence measures.
If you mess this up, it will affect every subsequent training step.
To learn more techniques on supercharging ML model training (with implementation), read this →
Thanks for reading!