Deploy any ML model, RAG or Agent as an MCP server
...using a 100% open-source tool.
In today’s newsletter:
Find the best prompt for your LLMs.
Deploy any ML model, RAG or Agent as an MCP server.
[Hands-on] Deploy a Qwen 3 Agentic RAG.
Find the best prompt for your LLMs
90% of AI products fail in the first month.
Mostly, it’s not due to bad models, but rather bad prompts.
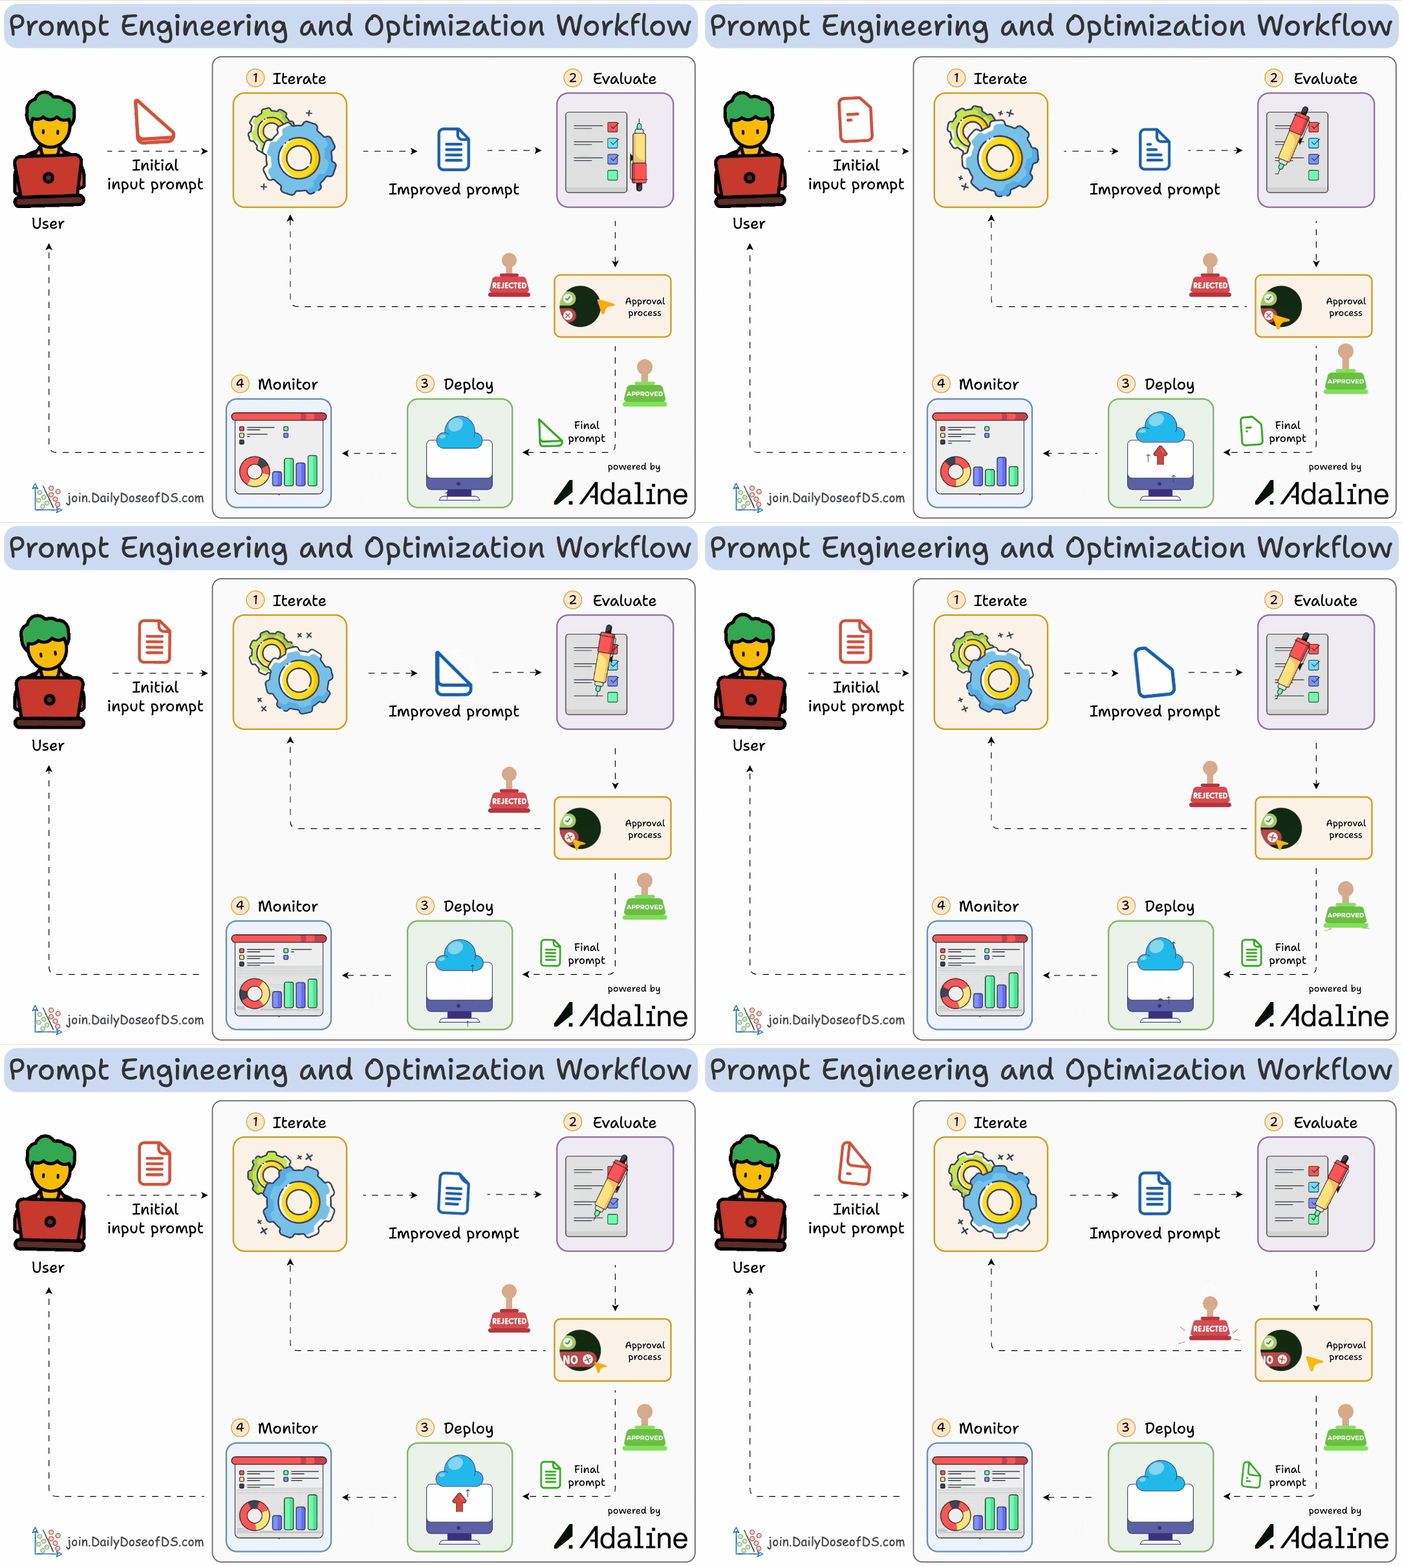
Adaline lets you create prompts, test across models and modalities, integrate tools, evaluate performance, and deploy them with real-time monitoring.
We created this video to share a detailed walkthrough of all 4 steps involved:
Use Adaline for free to build the best prompts for your LLMs here →
Deploy any ML model, RAG or Agent as an MCP server
Connecting AI models to apps usually takes a lot of custom coding for each case.
For instance, if you want an AI model to work in a Slack bot and a support dashboard, you might need to write separate bits of integration code for each.
Let us show you how to simplify this via MCPs.
We’ll use LitServe, a popular open-source serving engine for AI models built on FastAPI.
Essentially, LitServe now integrates MCP via a dedicated /mcp/ endpoint.
This means any AI model, RAG, Agent, etc., can be made accessible via MCP-compatible clients like Claude desktop or Cursor.
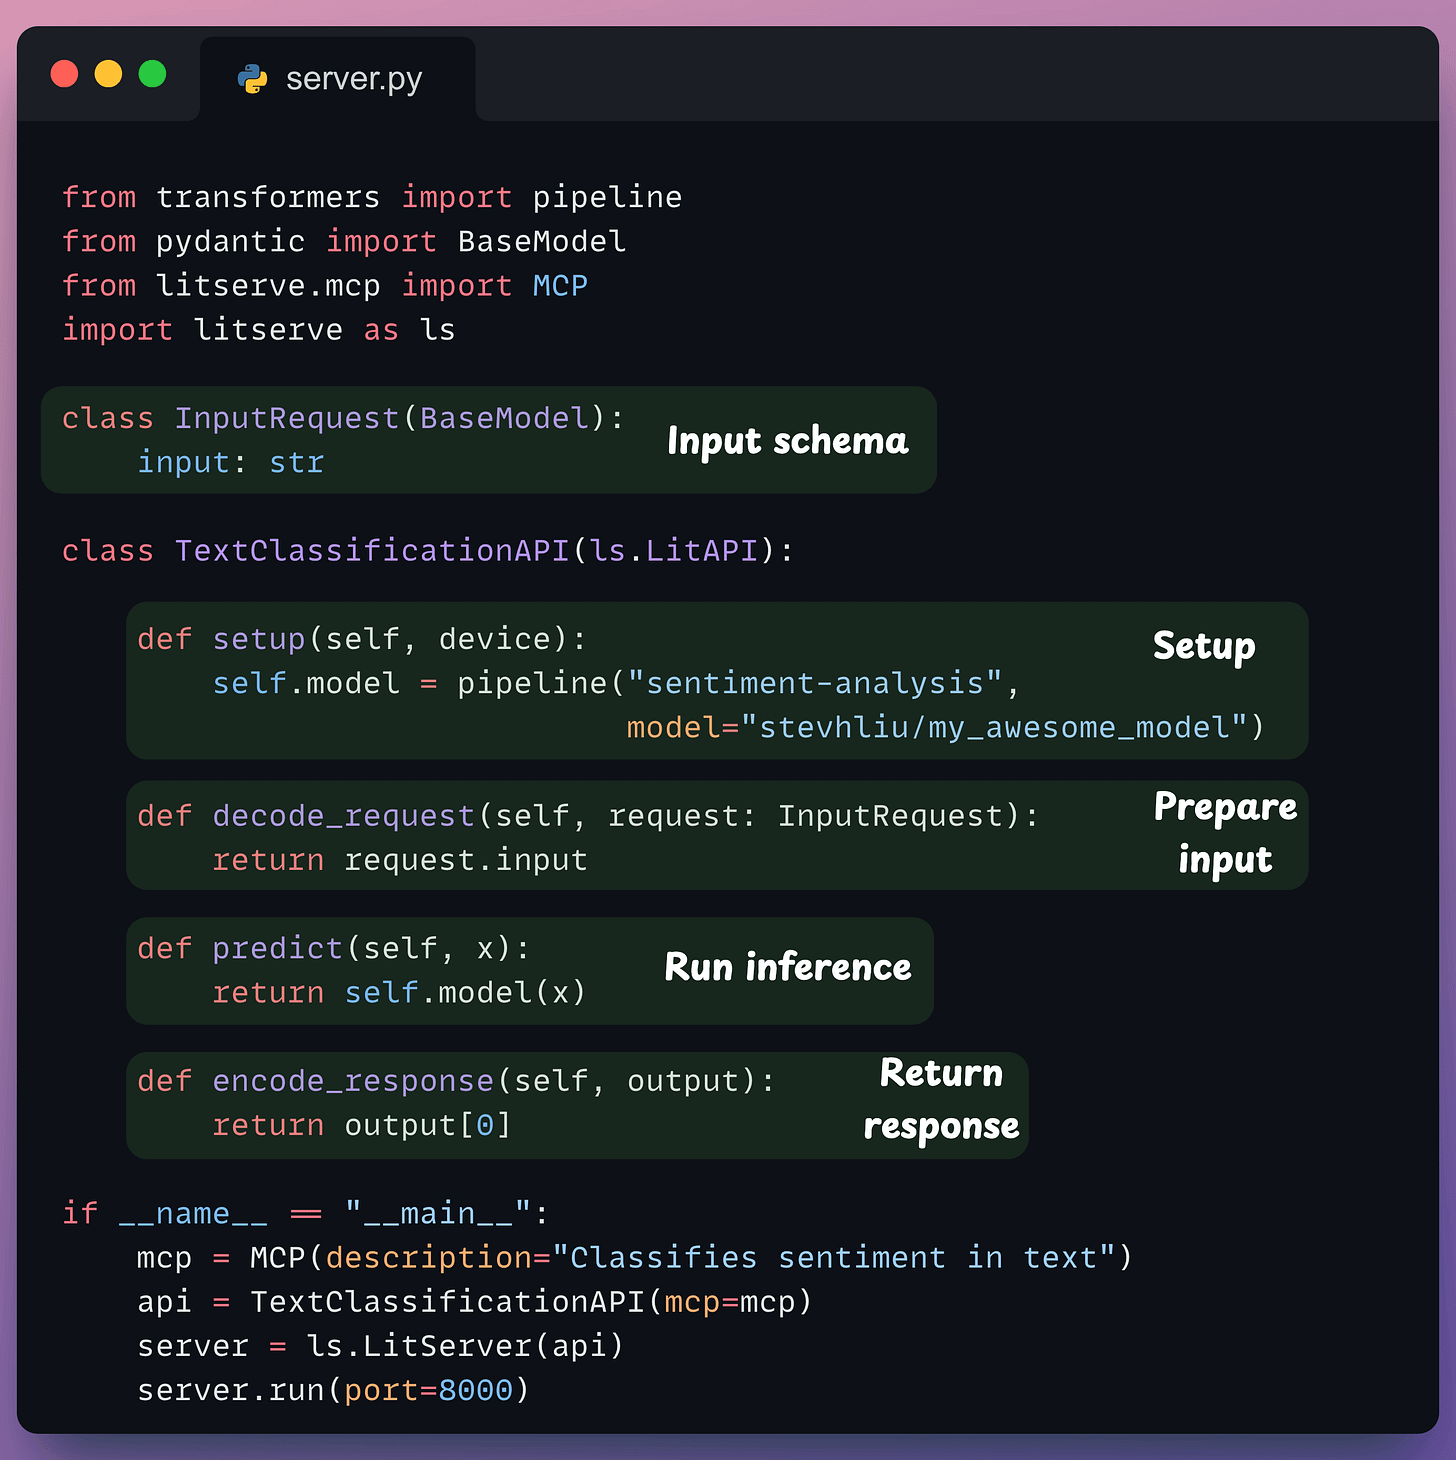
Here’s the entire code:
The
InputRequestclass defines the input schema.The
setupmethod defines the ML model. You can have anything in this method (Agent, RAG, etc.) that you want to deploy as an MCP server.The
decode_requestmethod prepares the input.The
predictmethod runs the inference logic to produce an output.The
encode_responsemethod sends the response back.The main guard runs the LitServe API with MCP enabled.
Done!
Run it (python server.py) to have the model available as an MCP server.
Next, add the following config to Claude Desktop:
With that, you will have your model available as an MCP server here:
We can interact with it below:
We like LitServe because:
It’s 2x faster than vanilla FastAPI.
You can serve any model (LLM, vision, audio, multimodal).
You can compose agents, RAG & pipelines in one file.
You can add custom logic & have full control over inference.
You can find the LitServe MCP docs here →
Also, in case you missed it, we started a foundational implementation-heavy crash course on MCP recently:
In Part 1, we introduced:
Why context management matters in LLMs.
The limitations of prompting, chaining, and function calling.
The M×N problem in tool integrations.
And how MCP solves it through a structured Host–Client–Server model.
In Part 2, we went hands-on and covered:
The core capabilities in MCP (Tools, Resources, Prompts).
How JSON-RPC powers communication.
Transport mechanisms (Stdio, HTTP + SSE).
A complete, working MCP server with Claude and Cursor.
Comparison between function calling and MCPs.
In Part 3, we built a fully custom MCP client from scratch:
How to build a custom MCP client and not rely on prebuilt solutions like Cursor or Claude.
What the full MCP lifecycle looks like in action.
The true nature of MCP as a client-server architecture, as revealed through practical integration.
How MCP differs from traditional API and function calling, illustrated through hands-on implementations.
In Part 4, we covered:
What exactly are resources and prompts in MCP.
Implementing resources and prompts server-side.
How tools, resources, and prompts differ from each other.
Using resources and prompts inside the Claude Desktop.
A full-fledged real-world use case powered by coordination across tools, prompts, and resources.
Continuing the discussion from deploying any ML model, RAG or Agent as an MCP server…
Let’s learn more about Agentic deployments with LitServe👇
Deploy a Qwen 3 Agentic RAG
We recently showcased how to deploy an Agentic RAG powered by Alibaba's latest Qwen 3.
Here's our tool stack:
CrewAI for Agent orchestration.
Firecrawl for web search.
LightningAI's LitServe for deployment.
The diagram shows our Agentic RAG flow:
The Retriever Agent accepts the user query.
It invokes a relevant tool (Firecrawl web search or vector DB tool) to get context and generate insights.
The Writer Agent generates a response.
You can read the newsletter issue detailing the process here →
Thanks for reading!


