
[Hands-on] Building Custom Tools for AI Agents
...explained with code.

Your Agent harness needs a harness too
Agent quality doesn’t live in the model. It lives in the harness. The same model with a better harness will be faster, smarter, and more efficient.
But maintaining that harness is still manual work in most teams. Someone is tuning the context window, classifying tool errors, tracking degradations, and manually repairing them.
Opik (open-source with 18k stars) implements patterns to solve this problem:
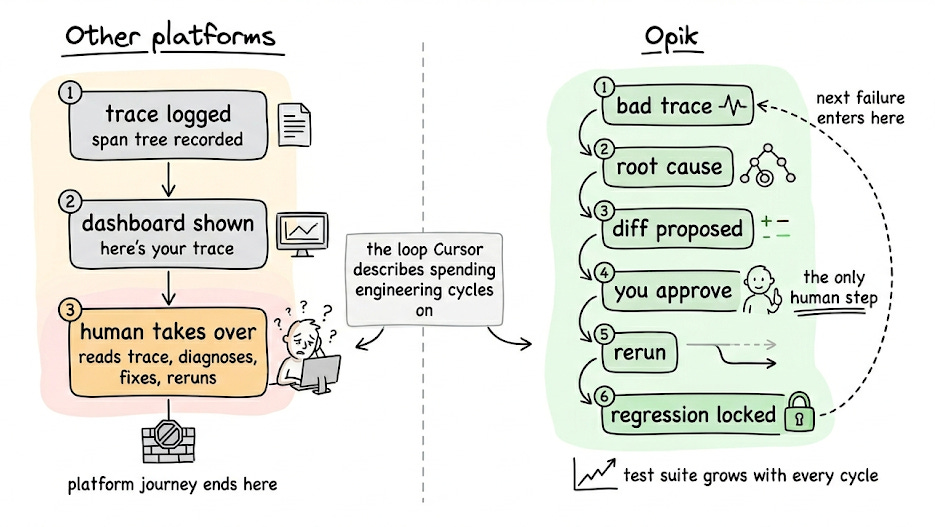
Test suites grow organically from real production failures.
You can write assertions in plain English (something like “the response must not hallucinate facts absent from the retrieved context”) and Opik evaluates traces against them.
Also, the whole regression suite builds itself over time from actual bugs.
Opik also ships with a debugging agent called Ollie. It reads the full span tree of a failing trace, reads the source code through opik connect, proposes a fix as a diff, reruns the agent with the same inputs, and saves the fix as a test case.
Agent configurations like prompts, tools, models, and params are versioned together as one unit with one-click rollback. The Agent Playground runs the full instrumented graph before deploying anything.
You can find the official documentation here →
We are working on a hands-on demo on this. Stay tuned!
Building custom tools for AI Agents
Agentic frameworks provide native support for several tools.
For instance, here are some powerful tools provided by CrewAI:
However, you may need to build custom tools at times.
Today, let us show how it’s done!
We’ll build a real-time currency conversion tool. Instead of making an Agent guess exchange rates, we will integrate a custom tool to help the Agent get live exchange rates.
Let’s begin!
First, get an exchange rate API key (it’s free) and specify it in the .env file:

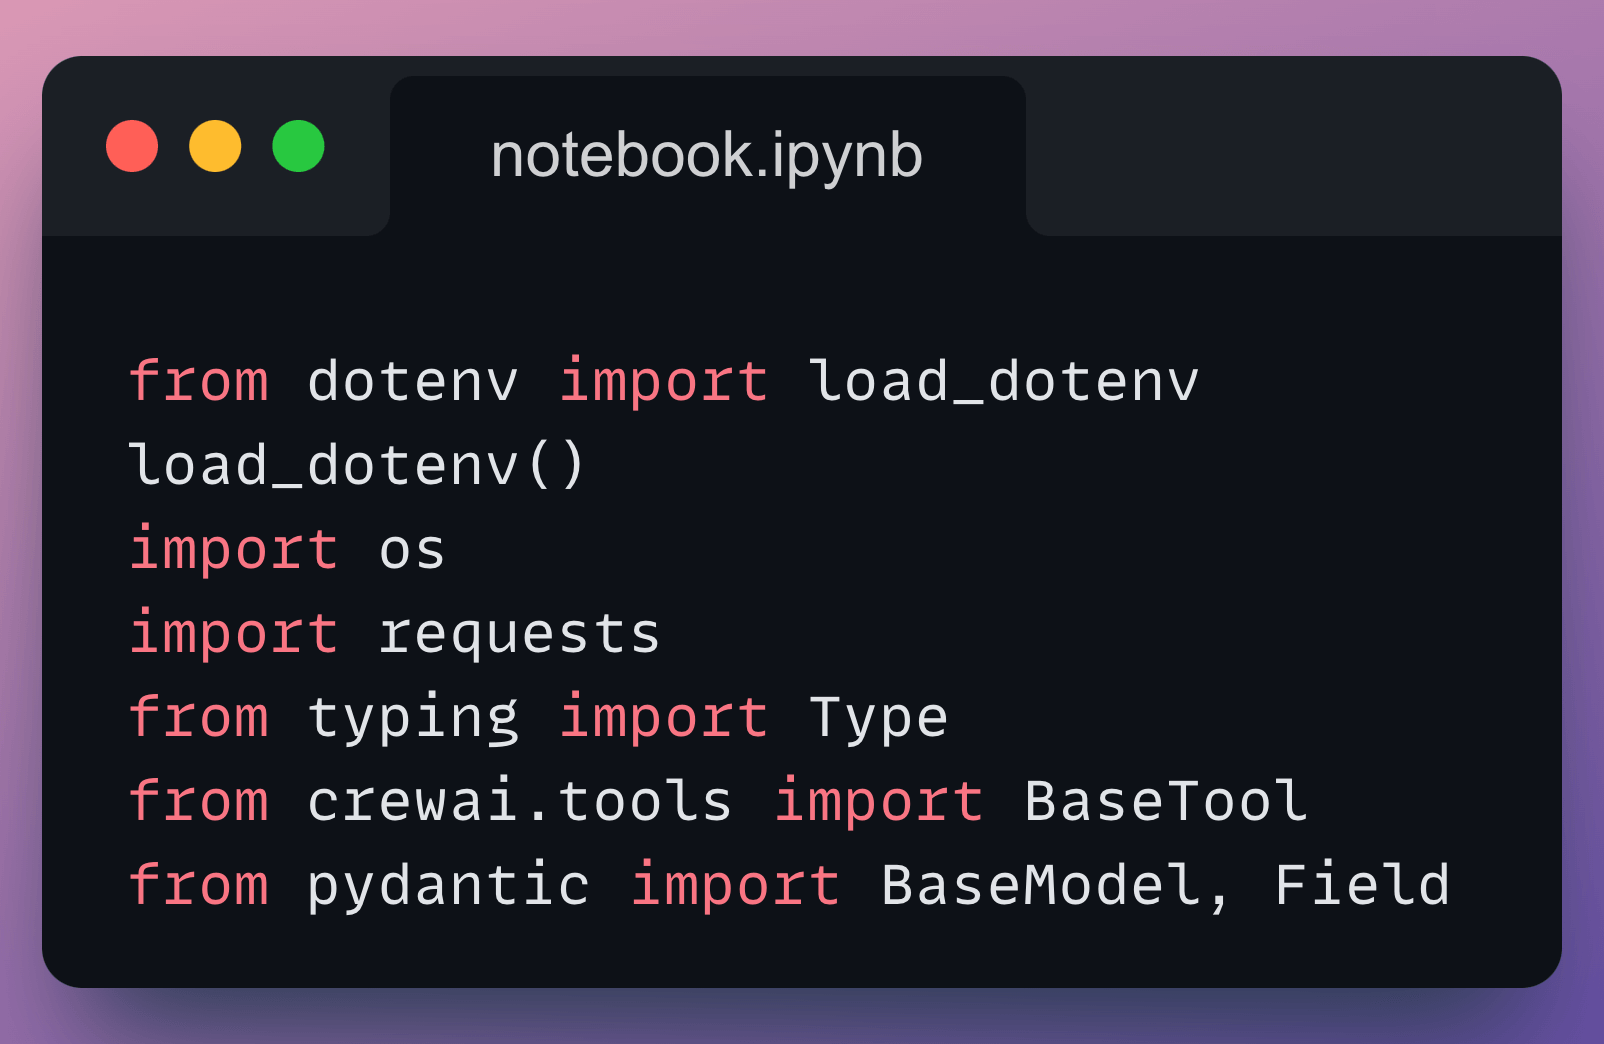
Next, we have some standard import statements:
To build a custom tool in CrewAI, you need to implement two classes:
#1) Class for input schema
Here, we declare the input fields the tool expects using Pydantic. Descriptions are important since they help the agent prepare a tool call.

#2) Class for the actual tool
Next, we define the CurrencyConverterTool by inheriting from BaseTool and declare attributes like name, description, arguments schema (which is the same as the input schema we defined above):

Every tool class has a _run method that implements the tool logic.

In the above code, we fetch live exchange rates using an API request. We also handle errors if the request fails or the currency code is invalid.
Done!
Now we build the Agent as usual and specify the tool we created above:

We define its Tasks:

We define the Crew and execute it:

Printing the response, we get this:

Works as expected!
Here, note that we directly passed a structured input to the Crew.
But real-world queries could look like this:
How much is 100 dollars in euros today?
We can introduce a Query Parser Agent (or even better…a regular LLM call) and produce structured outputs first. We can then pass the structured output like we did above.
Consider that an assignment from today’s newsletter issue, and feel free to reach out with your solution.
That said, we published a course to help you implement reliable Agentic systems, understand the underlying challenges, and develop expertise in building Agentic apps on LLMs, which every industry cares about now.
In Part 1, we covered the fundamentals of Agentic systems, understanding how AI agents act autonomously to perform tasks.
In Part 2, we extended Agent capabilities by integrating custom tools, using structured outputs, and we also built modular Crews.
In Part 3, we focused on Flows, learning about state management, flow control, and integrating a Crew into a Flow.
In Part 4, we extended these concepts into real-world multi-agent, multi-crew Flow projects.
In Part 5 and Part 6, we moved into advanced techniques that make AI agents more robust, dynamic, and adaptable, like Guardrails, Async execution, Callbacks, Human-in-the-loop, Multimodal Agents, and more.
In Part 8 and Part 9, we primarily focused on 5 types of Memory for AI agents, which help agents “remember” and utilize past information.
In Part 10, we implemented the ReAct pattern from scratch.
In Part 11, we implemented the Planning pattern from scratch.
In Part 12, we implemented the Multi-agent pattern from scratch.
In Part 13 and Part 14, we covered 10 practical steps to improve Agentic systems.
Of course, if you have never worked with LLMs, that’s okay. We cover everything in a practical and beginner-friendly way.
Thanks for reading!