

🔥Scrape a webpage in 3 lines of code

AI systems love neatly formatted data—Markdowns, Structured data, HTML, etc.
And now it is easier than ever to produce LLM-digestible data!
Firecrawl takes a URL, crawls it, and converts it into a clean markdown or structured format in just 3 lines of code. Check the code above.
Thanks to Firecrawl for partnering today!
Deploy a Qwen 3 Agentic RAG
Today, we'll learn how to deploy an Agentic RAG powered by Alibaba's latest Qwen 3.
Here's our tool stack:
CrewAI for Agent orchestration.
Firecrawl for web search.
LightningAI's LitServe for deployment.
The video at the top shows this in action.
The diagram shows our Agentic RAG flow:
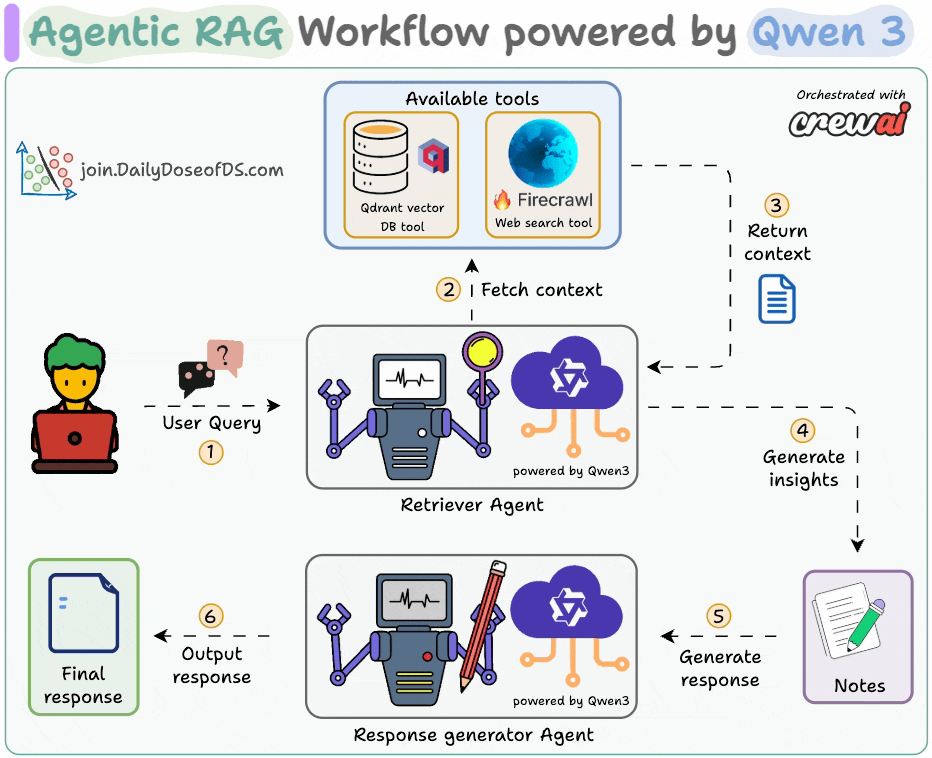
The Retriever Agent accepts the user query.
It invokes a relevant tool (Firecrawl web search or vector DB tool) to get context and generate insights.
The Writer Agent generates a response.
Next, let's implement and deploy it!
The code is linked later in the issue.
Here's the entire code to serve our Agentic RAG.

The
setupmethod orchestrates the Agents.The
decode_requestmethod prepares the input.The
predictmethod invokes the Crew.The
encode_responsemethod sends the response back.
Let's understand it step-by-step below
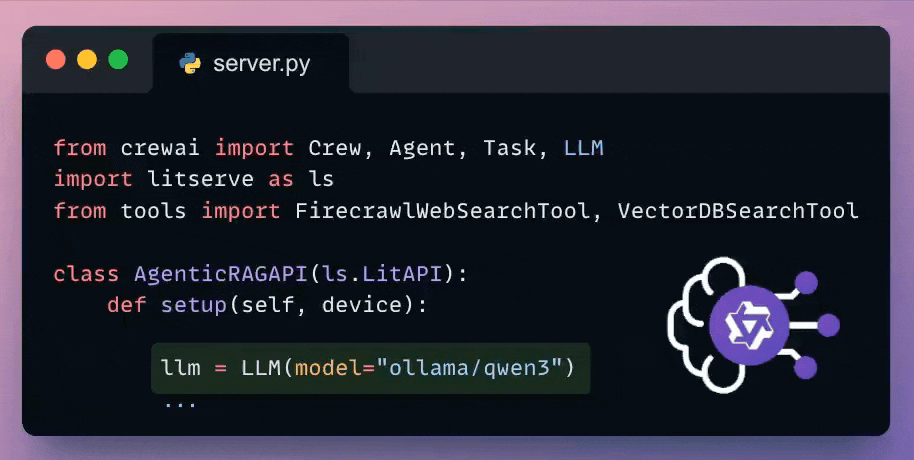
Set up LLM
CrewAI seamlessly integrates with all popular LLMs and providers.
Here's how we set up a local Qwen 3 via Ollama.
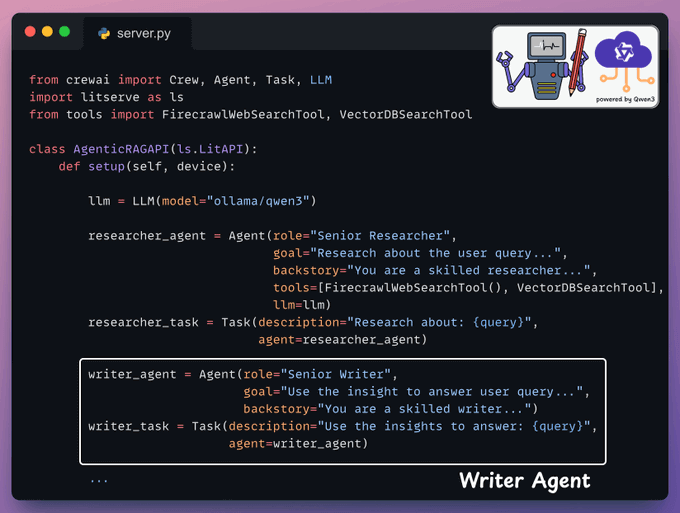
Define Research Agent and Task
This Agent accepts the user query and retrieves the relevant context using a vectorDB tool and a web search tool powered by Firecrawl.
Again, put this in the LitServe setup() method:

Define Writer Agent and Task
Next, the Writer Agent accepts the insights from the Researcher Agent to generate a response.
Yet again, we add this in the LitServe setup method:
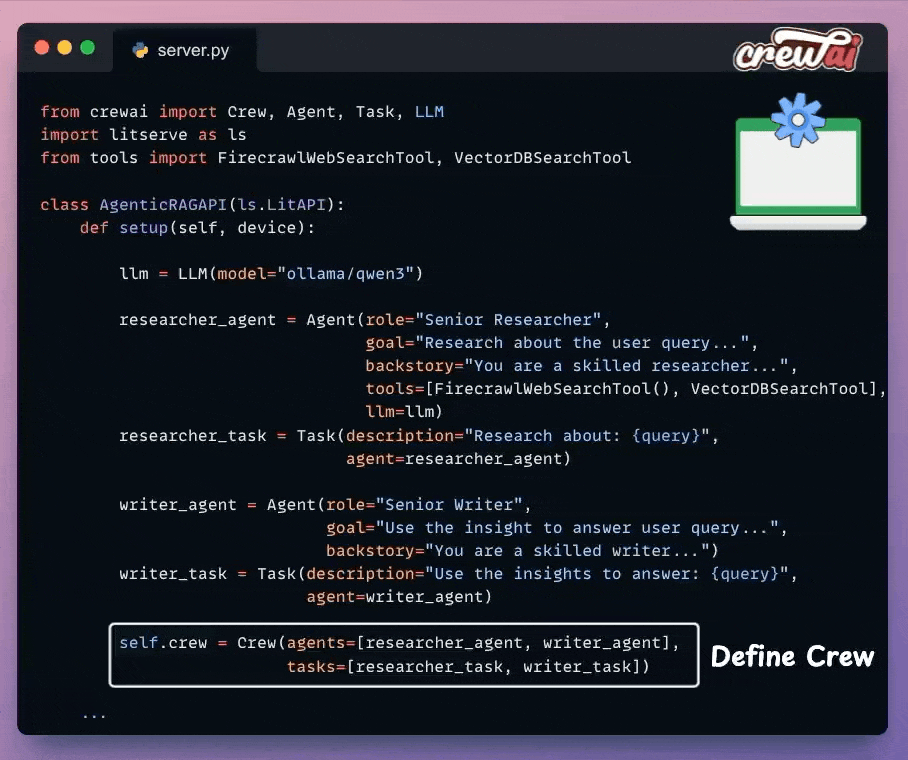
Set up the Crew
Once we have defined the Agents and their tasks, we orchestrate them into a crew using CrewAI and put that into a setup method.
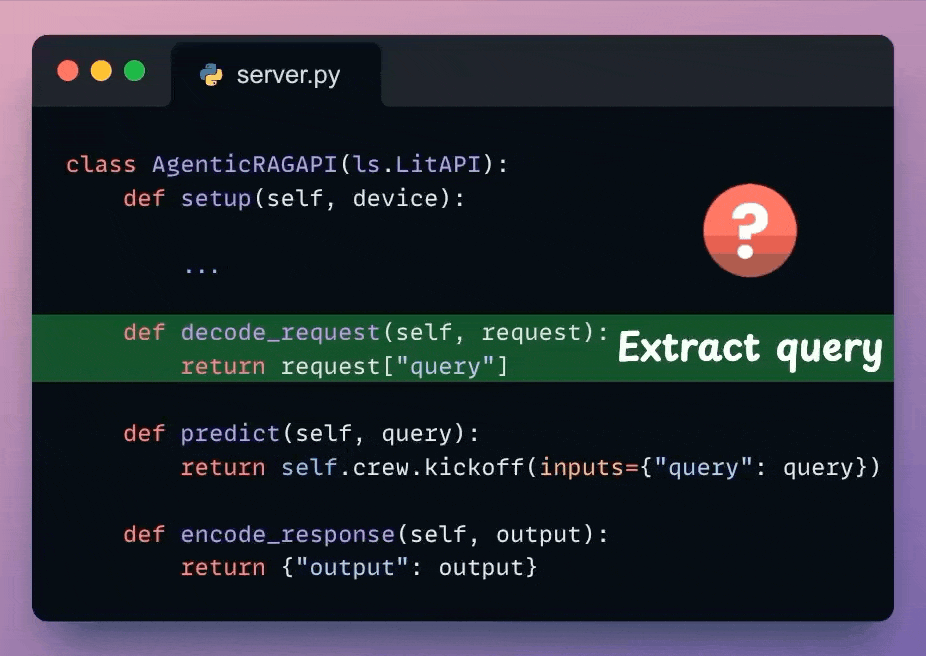
Decode request
With that, we have orchestrated the Agentic RAG workflow, which will be executed upon an incoming request.
Next, from the incoming request body, we extract the user query.
Check the highlighted code below:
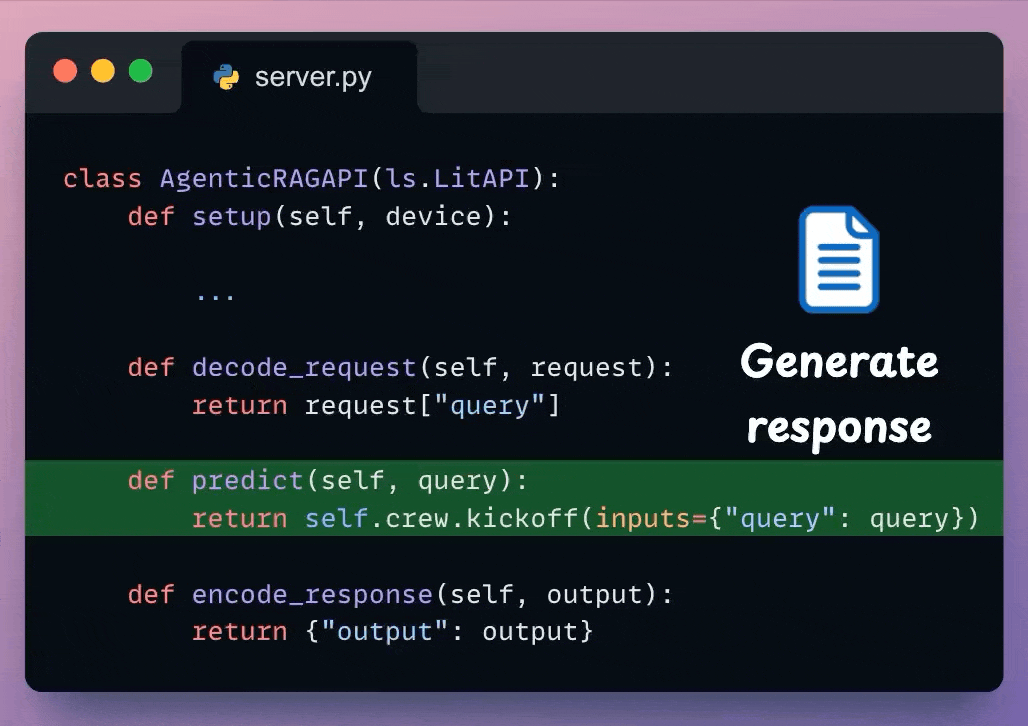
Predict
We use the decoded user query and pass it to the Crew defined earlier to generate a response from the model.
Check the highlighted code below:
Encode response
Here, we can post-process the response & send it back to the client.
Note: LitServe internally invokes these methods in order: decode_request → predict → encode_request.
Check the highlighted code below:

With that, we are done with the server code.
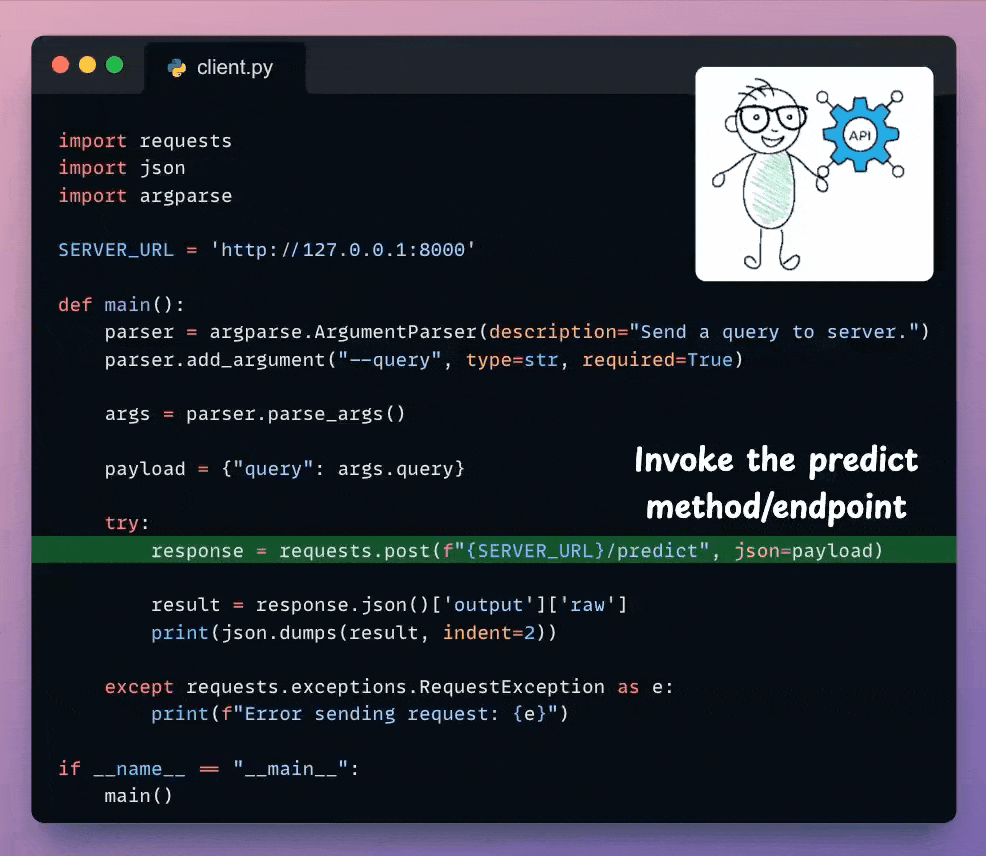
Next, we have the basic client code to invoke the API we created using the requests Python library:
Done!
We have deployed our fully private Qwen 3 Agentic RAG using LitServe. Here's a recap of our deployed Qwen3 Agentic RAG.
That said, we started a crash course to help you implement reliable Agentic systems, understand the underlying challenges, and develop expertise in building Agentic apps on LLMs, which every industry cares about now.
Here’s what we have done in the crash course (with implementation):
In Part 1, we covered the fundamentals of Agentic systems, understanding how AI agents act autonomously to perform tasks.
In Part 2, we extended Agent capabilities by integrating custom tools, using structured outputs, and we also built modular Crews.
In Part 3, we focused on Flows, learning about state management, flow control, and integrating a Crew into a Flow.
In Part 4, we extended these concepts into real-world multi-agent, multi-crew Flow projects.
In Part 5 and Part 6, we moved into advanced techniques that make AI agents more robust, dynamic, and adaptable, like Guardrails, Async execution, Callbacks, Human-in-the-loop, Multimodal Agents, and more.
In Part 8 and Part 9, we primarily focused on 5 types of Memory for AI agents, which help agents “remember” and utilize past information.
In Part 10, we implemented the ReAct pattern from scratch.
In Part 11, we implemented the Planning pattern from scratch.
In Part 12 and Part 13, we covered 10 practical steps to improve Agentic systems.
Of course, if you have never worked with LLMs, that’s okay. We cover everything in a practical and beginner-friendly way.
You can find the code in this GitHub repo →
Thanks for reading, and we’ll see you next week!
